May 1 – Almost done!
So the Remington 700 project has taken on two pathways to
the finish line. Since your author
screwed up on the drilling of the scope mounts, I’ve had to wait for new base
screws to arrive from MidwayUSA.
Well…they showed up last night!
While I was patiently waiting I went ahead and worked on the
final finish and fitting of the stock.
After numerous sessions of “sanding in” the linseed oil, followed by
multiple applications of polyurethane we have the finished stock! (less the checkering on the grip and
fore end….that will come later.)
Just for you purists out there….I still need to bore in the sling studs
too….those are still to arrive, but that is a fairly easy process.
So here is the rifle with everything attached:
Now…to back up a bit...
The first thing I had to do was enlarge the screw holes on
the front of the receiver to accept the larger screws. Just drilling them out wouldn’t help
much for a screw,…they needed to be taped…that is; screw threads needed to be
installed in the holes.
This little device cuts matching screw holes into the bored
out holes:
Now to place the bases on the receiver and line everything
up:
Ok…now that the bases and rings are installed its time to
install the actual scope. To do
this we need to make sure that everything is level. Making sure the scope to the rifle is level is critical to
making sure the scope actually points to the target and has the same relation
as the rile. For this little
operation we need a series of levels.
Wheeler Engineering makes these nifty scope levels as seen here:
So…now we have the scope attached, but is it lined up
perfectly? Short answer is
no. For final alignment we’ll need
to throw lead down range and adjust the scope to the bullet impact. What I don’t want to do is shoot
bullets that don’t even hit the paper target and be forced to guess how to make
corrections. What I want to is to
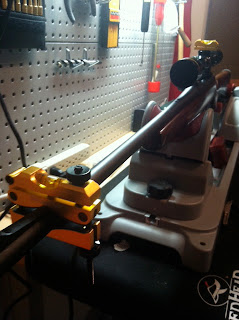
be assured before I ever leave for the range that my rifle is “on paper”. For that I need one of these little
babies:
This is a Boresighter…that silver stick thing goes in the
muzzle of the rifle and expands to form a solid fit. Then that cone shaped device points back directly at the
scope. Looking through the scope
(on low power) I can now see a little graph. By adjusting the cross hairs so that they are centered on
the graph I can be assured that the scope is set to at least hit on paper at a
hundred yards. Once I shoot three
rounds and see where they impact I can make fine adjustments to move the
grouping to the center of the target.
So…now the next step is to install the sling studs when they
arrive and then begin the slow tedious process of checkering the
stock….hopefully I’ll get a day in there to take it to the range and actually
see how she shoots!


No comments:
Post a Comment